IntoducciónLo más importante es que el procesador tenga Virtual Technology, empezamos comprobando si el procesador esta incluido en la
lista de CPUs que soportan HVM.Verificamos si el procesador soporta el conjunto instrucciones de virtualización compatible con KVM. Buscamos la cadena vmx o svm en los flags del procesador.
cat /proc/cpuinfo | grep vmx # Intel
cat /proc/cpuinfo | grep svm # AMD
deberías obtener un resultado parecido a:
INTEL
flags: fpu vme de pse tsc msr pae mce cx8 apic sep mtrr pge mca cmov pat pse36 clflush dts acpi mmx fxsr sse sse2 ss ht tm pbe syscall nx lm constant_tsc arch_perfmon pebs bts rep_good pni monitor ds_cpl vmx est tm2 ssse3 cx16 xtpr dca sse4_1 lahf_lm
AMD
flags: fpu vme de pse tsc msr pae mce cx8 apic sep mtrr pge mca cmov pat pse36 clflush mmx fxsr sse sse2 ht syscall nx mmxext fxsr_opt rdtscp lm 3dnowext 3dnow rep_goodpni cx16 lahf_lm cmp_legacy svm extapic cr8_legacy 3dnowprefetch
Si no obtenemos la salida, KVM no funcionará.
Revisar que el BIOS de la maquina tenga habilitada la opción de Virtual Technology
Instalar KVM y otros.Activar el repositorio Universe y actualizar el sistema.
sudo su
vim /etc/apt/source.list
[...]
deb http://ar.archive.ubuntu.com/ubuntu/ hardy universe
deb-src http://ar.archive.ubuntu.com/ubuntu/ hardy universe
deb http://ar.archive.ubuntu.com/ubuntu/ hardy-updates universe
deb-src http://ar.archive.ubuntu.com/ubuntu/ hardy-updates universe
[...]
aptitude update
aptitude upgrade
aptitude install qemu virt-manager libvirt-bin kvm
Añadimos los usuarios que queremos administren KVM al grupo kvm
adduser kvm
Reiniciamos el Equipo.
Probamos el comando kvm
kvm
Si aparece el siguiente mensaje, el procesador no soporta instrucciones de virtualización (aun habiendo aprobado el test de flags) o el BIOS tiene deshabilitado la opción de Virtualización.
open /dev/kvm: No such file or directory
Could not initialize KVM, will disable KVM support
Ubuntu does not support running KVM without hardware acceleration. Sorry.
Para ser ordenados creamos un directorio donde alojaremos nuestras maquinas virtuales.
mkdir /home/kvm
chown nobody.nogroup /home/kvm
KVM y Qemu se pueden manejar desde comand line (de ahora en adelante 'CL') o desde un entorno grafico.
Administrar KVM desde CL.Creando un Guest.
aptitude install ubuntu-vm-builder
ubuntu-vm-builder kvm hardy \
--domain vmX \
--dest /home/kvm/vmX \
--arch i386 \
--hostname vmX \
--mem 256 \
--user bgx \
--pass elpass \
--ip \
--mask \
--net \
--bcast \
--gw \
--dns \
--mirror http://archive.localubuntumirror.net/ubuntu \
--components main,universe \
--addpkg vim openssh-server molly-guard etckeeper \
--libvirt qemu:///system ;
Usar una imagen de CD de la distribucion linux que mas nos guste.
Cambiamos la opción mirror:
mount -o loop path_to_image/imagen.iso /mnt
ubuntu-vm-builder --mirror /mnt
Otras herramientas con las que contamos son python-virtinst (virt-install, virt-clone, virt-viewer).
Ejemplo clonado de guest usando virt-clone.
virt-clone -o vm_origen -n hostname_nuevo --file /home/kvm/nueva_maquina/disco.img
Para visualizar la cantidad de maquinas funcionando, detenerlas, arrancarlas, hacer hot-plug de un dispositivo usb, etc... utilizamos "Virtual Shell".
El comando virsh es parte del paquete libvirt.
Existen multitud de comandos para manipular imagenes con virsh. Para manipular las imagenes con virsh necesitamos ser agregado al grupo libvirtd.
aptitude install libvirt-bin
adduser libvirtd
virsh
Welcome to virsh, the virtualization interactive terminal.
Type: 'help' for help with commands
'quit' to quit
virsh # help
Commands:
help print help
attach-device attach device from an XML file
attach-disk attach disk device
attach-interface attach network interface
autostart autostart a domain
capabilities capabilities
connect (re)connect to hypervisor
console connect to the guest console
create create a domain from an XML file
start start a (previously defined) inactive domain
destroy destroy a domain
detach-device detach device from an XML file
detach-disk detach disk device
detach-interface detach network interface
define define (but don't start) a domain from an XML file
domid convert a domain name or UUID to domain id
domuuid convert a domain name or id to domain UUID
dominfo domain information
domname convert a domain id or UUID to domain name
domstate domain state
domblkstat get device block stats for a domain
domifstat get network interface stats for a domain
dumpxml domain information in XML
freecell NUMA free memory
hostname print the hypervisor hostname
list list domains
migrate migrate domain to another host
net-autostart autostart a network
net-create create a network from an XML file
net-define define (but don't start) a network from an XML file
net-destroy destroy a network
net-dumpxml network information in XML
net-list list networks
net-name convert a network UUID to network name
net-start start a (previously defined) inactive network
net-undefine undefine an inactive network
net-uuid convert a network name to network UUID
nodeinfo node information
quit quit this interactive terminal
reboot reboot a domain
restore restore a domain from a saved state in a file
resume resume a domain
save save a domain state to a file
schedinfo show/set scheduler parameters
dump dump the core of a domain to a file for analysis
shutdown gracefully shutdown a domain
setmem change memory allocation
setmaxmem change maximum memory limit
setvcpus change number of virtual CPUs
suspend suspend a domain
ttyconsole tty console
undefine undefine an inactive domain
uri print the hypervisor canonical URI
vcpuinfo domain vcpu information
vcpupin control domain vcpu affinity
version show version
vncdisplay vnc display
Administrar KVM desde GUI a través de SSH.Esta opción es mucho mas intuitiva y "user friendly"
aptitude install virt-manager xauth
Desde una maquina remota con X11 podemos acceder al servidor a través de ssh habilitando la opción de gráficos.
ssh -X server_hostname_o_ip
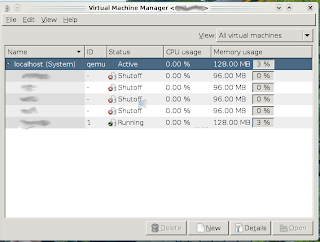
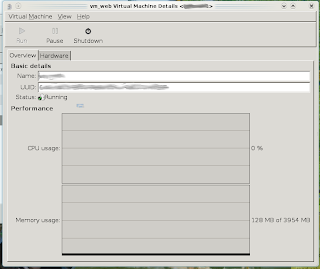
El resultado será la GUI de Virt-manager en nuestro escritorio, de donde podemos administrar todas las maquina virtuales, crear nuevas y modificar las existentes.


